
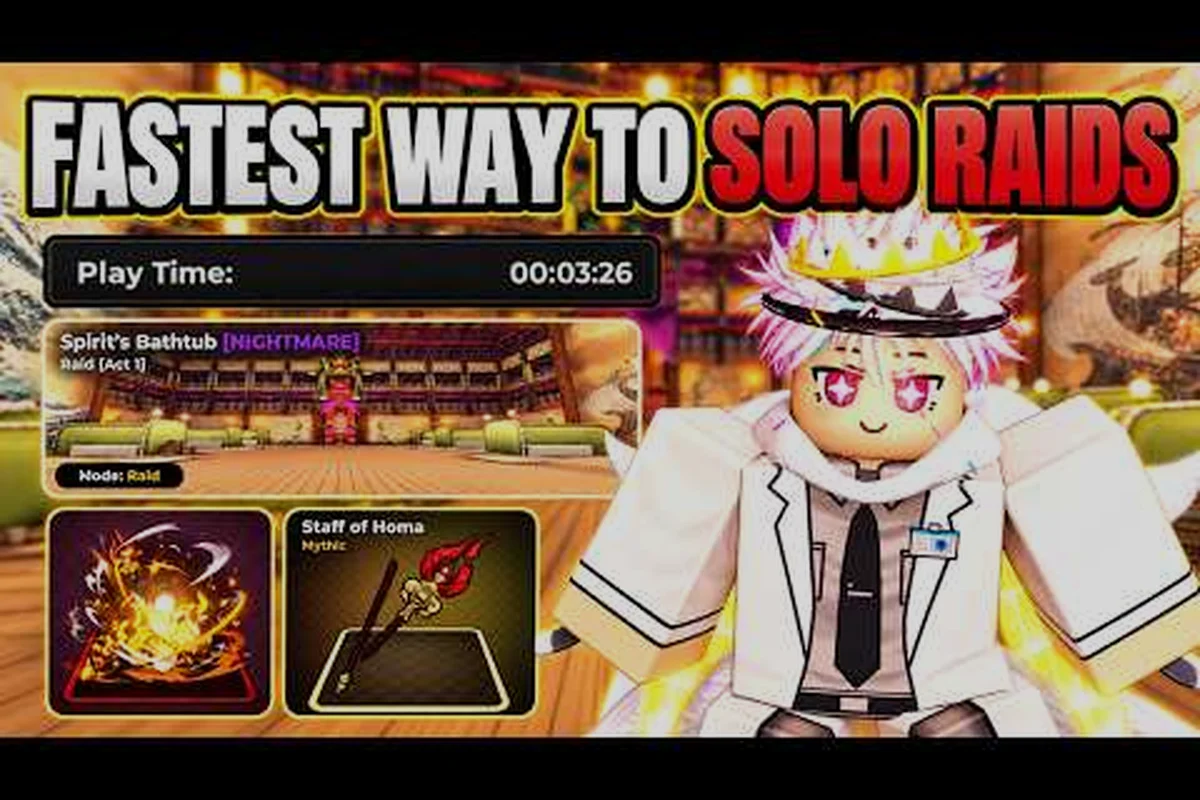
Raids represent the definitive endgame progression system in Anime Zero, and understanding the exact unlock path saves you hours of wasted grinding. The anime zero how to unlock raids process is gated behind specific level thresholds and quest completions that many players miss entirely, leaving them stuck at mid-game power levels while others push into shadow monarch territory. This guide breaks down every requirement, the mochi commander turret mechanics that wall unprepared teams, and the strategic loadouts that turn failed attempts into consistent clears.
Raid Unlock Requirements and Level Gates
The path to raiding in Anime Zero is not a single unlock event but a layered progression chain that begins much earlier than most players expect. Community testing consistently shows that players who rush main story quests without building proper accessory sets hit a hard wall at the first raid gate, forcing them to backtrack and farm materials they skipped. The anime zero raid level requirement varies depending on which raid tier you are targeting, but the entry point is more forgiving than the later gates.
Understanding the Progression Chain
Before you can even see raid markers on your map, you need to complete the Shadow Gate story arc and reach the minimum combat rating that the game checks silently in the background. Players report that the first raid becomes visible around level 85, though the recommended level sits closer to level 95 for a comfortable clear without relying on carries. The game does not display an explicit raid level requirement in a tutorial popup, which is why so many players ask how to unlock raids in community threads.
The unlock sequence follows a predictable pattern that mirrors the main story progression. You must first clear the Temple of the Forgotten dungeon, then speak with the Raid Coordinator NPC in the hub area, and finally complete a short attunement quest that sends you back into a scaled version of an earlier zone. Skipping any step leaves the raid portal inactive, and the NPC dialogue does not always make the missing requirement obvious.
| Unlock Step | Requirement | Player-Reported Level | Notes |
|---|---|---|---|
| Shadow Gate Arc | Complete all story missions | 70-80 | Unlocks raid UI element |
| Temple of the Forgotten | Clear dungeon solo | 80-85 | Drops first raid key fragment |
| Raid Coordinator Dialogue | Speak with hub NPC | 85 | Triggers attunement quest |
| Attunement Quest | Defeat 50 elite mobs | 85-90 | Scaled zone, group optional |
| First Raid Portal | All above complete | 90+ | Mochi Commander entry |
The attunement quest is the step most frequently missed because it does not appear in the main quest tracker. You need to manually accept it from the coordinator, and the objective text only appears in the side quest panel. Players who skip this dialogue and head straight to the portal find it inactive, leading to confusion about whether their level is too low.
Why Level 90 Is the Soft Floor
The community consensus places the practical anime zero raid level requirement at level 90 for the first raid tier, despite the portal technically activating earlier. This gap exists because the Mochi Commander fight includes a turret phase that punishes under-leveled players with unavoidable damage if their health pool cannot absorb at least two consecutive hits. At level 85, most builds lack the raw stats to survive that phase without a dedicated healer, which public lobbies rarely provide.
Your accessory loadout matters more than raw level for surviving the first clear. Players stacking damage reduction traits report clearing at level 88, while glass cannon builds struggle even at level 95. The game checks your total combat power rather than level alone, so a well-optimized level 88 character can outperform a poorly geared level 97 character in the same raid.
Mochi Commander Fight Breakdown and Turret Mechanics
The Mochi Commander serves as the introductory raid boss in Anime Zero, but calling it introductory undersells the mechanical complexity of the encounter. The fight tests positioning, burst damage coordination, and target priority in ways that story content never does, which is why so many first-time raiders wipe repeatedly before understanding the mochi commander turret phase. Learning this fight properly creates the foundation for every subsequent raid tier, including the shadow monarch raid.
Phase One: Commander Direct Combat
The opening phase feels manageable because the Mochi Commander uses telegraphed melee swings and a slow projectile volley. Your team should spread out to avoid overlapping hitboxes, then collapse onto the boss during the recovery window after each triple-swing combo. The boss gains a stacking damage buff every 30 seconds, which functions as a soft enrage timer that pushes teams toward efficient clears rather than attrition strategies.
The key mistake early teams make is burning ultimate abilities during phase one. The commander's health pool is large enough that early ultimates wear off before the dangerous turret phase begins, leaving your team without burst damage when it matters most. Save your highest-damage cooldowns for the transition, and use basic rotations to chip through the first 60% of the health bar.
Phase Two: Turret Priority and Positioning
At 60% health, the Mochi Commander retreats to the arena edge and deploys the mochi commander turret, a stationary cannon that fires high-damage projectiles in a rotating pattern. The turret itself has a separate health pool and must be destroyed before the commander returns to active combat. Teams that ignore the turret and continue hitting the commander find themselves overwhelmed by accumulating projectile damage.
The turret fires in a clockwise sweep pattern that leaves safe zones between projectiles, but the safe zones shrink as the turret's health drops. This inverse difficulty curve means the final 20% of the turret's health is the most dangerous part of the entire fight. Assign your two highest-mobility players to turret duty while the rest of the team clears the adds that spawn during this phase, because the adds apply a slow debuff that makes dodging turret projectiles nearly impossible.
| Turret Phase Element | Mechanic | Counterplay | Priority |
|---|---|---|---|
| Rotating Projectiles | Clockwise sweep, shrinking safe zones | Stay mobile, strafe opposite direction | High |
| Add Spawns | Apply slow debuff on hit | Dedicated add-clear player | High |
| Commander Shield | Boss takes 80% reduced damage | Wait for turret destruction | Low |
| Turret Overcharge | Final 20% fires faster | Burst cooldowns, focus fire | Critical |
| Arena Hazards | Floor zones deal ticking damage | Reposition after each sweep | Medium |
The turret overcharge mechanic catches teams off guard because the projectile speed increases dramatically when the turret drops below 20% health. This is the moment to commit every remaining ultimate and burst cooldown, because a prolonged overcharge phase inevitably leads to deaths. Teams that hold cooldowns through this phase often wipe with the turret at 5% health, which is the most frustrating outcome in the fight.
Phase Three: Commander Return and Execute
Once the turret falls, the Mochi Commander returns with a damage vulnerability debuff that lasts 15 seconds. This window is your team's primary damage opportunity, and coordinating burst here separates clean kills from messy ones. The commander's melee patterns become more aggressive in this phase, with shorter telegraphs and a new charge attack that targets the furthest player.
Position your tank or highest-health player at maximum range to bait the charge, then have the rest of the team collapse on the boss's back during the charge recovery. This bait-and-punish loop repeats until the commander dies, and teams that master it find the final phase easier than the turret phase that preceded it.
Best Raid Strategy and Team Composition
The anime zero best raid strategy depends less on individual skill and more on role clarity and cooldown coordination. Public lobbies fail because four players all try to do the same thing, leaving gaps in add control, turret damage, and boss positioning. A coordinated team with average gear clears faster than a stacked team with no role assignment, which is a pattern that holds across every raid tier in the game.
Role Assignment Framework
Every successful raid team needs four distinct roles, though players can flex between roles during different phases. The tank controls boss positioning and baits charge attacks, the burst DPS focuses turret and vulnerability windows, the add-clear handles spawns and applies debuffs, and the support provides healing or shields while managing the arena. Teams without a dedicated add-clear player consistently wipe during the turret phase because the slow debuff stacks too quickly.
The support role in Anime Zero raids is less about healing throughput and more about debuff cleansing. The slow applied by turret-phase adds is cleansable, and a support player who prioritizes cleanse over healing prevents more damage than any heal rotation. This distinction matters because many players coming from other games assume support means pure healing output.
Cooldown Coordination and Burst Windows
The single biggest damage increase in any Anime Zero raid comes from aligning team ultimates with the vulnerability windows that follow turret destruction. Random ultimate usage wastes the 15-second damage amplification, while coordinated burst during that window can delete 30% or more of the boss's remaining health. Teams that practice this coordination clear raids in half the time of teams that do not.
| Strategy Element | Poor Execution | Optimal Execution | Impact |
|---|---|---|---|
| Ultimate Timing | Used on cooldown | Saved for vulnerability windows | 30%+ damage difference |
| Add Control | Ignored until dangerous | Dedicated player, immediate focus | Prevents wipes |
| Positioning | Clumped together | Spread for projectiles, collapse for burst | Survives turret phase |
| Turret Focus | Split damage | All DPS on turret at 60% | Faster phase transition |
| Charge Baiting | Random target | Furthest player baits | Controlled boss movement |
The charge baiting strategy deserves special attention because it converts a dangerous mechanic into a predictable one. When the commander targets the furthest player, that player can position near a wall to minimize the charge distance, giving the rest of the team more time to react. This technique applies to the shadow monarch raid as well, though that fight adds additional layers of complexity on top of the base mechanics.
Gear and Trait Priorities for Raiding
Your raid performance improves dramatically when you prioritize damage reduction traits over raw damage output, especially for your first few clears. The game's trait system offers several defensive options that reduce incoming damage by meaningful percentages, and stacking two or three of these traits makes the turret phase significantly more forgiving. Players who build pure offense find themselves dying to mechanics that defensive builds survive comfortably.
The Anime Zero loadout tier list provides a detailed breakdown of which traits and accessories perform best in raid content, with specific rankings for the shadow monarch tier. While that guide covers the full meta, the short version for raiding is that survivability traits outperform damage traits until you can clear the Mochi Commander without deaths.
Shadow Monarch Raid Progression and Requirements
The shadow monarch raid represents the current pinnacle of Anime Zero's raid content, and the jump in difficulty from Mochi Commander is substantial. Players who clear the first raid comfortably often assume the next tier will be a smooth step up, but the shadow monarch fight introduces mechanics that invalidate strategies that worked previously. Understanding what changes prepares you for the progression wall before you hit it.
Entry Requirements and Gear Check
The anime zero shadow monarch raid requires a significantly higher combat rating than the Mochi Commander, with community reports placing the entry gate around level 120 for a comfortable clear. The portal activates at a lower level, but the fight's damage check phases punish teams that cannot meet DPS thresholds, making the practical requirement higher than the technical unlock. Players who attempt the fight under-leveled find themselves hitting an unpassable wall during the shadow clone phase.
Your gear needs to include at least one raid-tier weapon from the Mochi Commander loot table before attempting the shadow monarch. The damage difference between story weapons and raid weapons is substantial, and the shadow monarch's health pool assumes you have made that upgrade. Teams attempting the fight with story gear report hitting the enrage timer with the boss above 30% health.
Shadow Monarch Unique Mechanics
The shadow monarch fight introduces a shadow clone phase where the boss splits into multiple copies, each with a fraction of the main health pool. Only one clone is the real boss, and attacking the wrong clone wastes damage while the real one regenerates health. Teams that cannot identify the real clone quickly fall behind the damage curve and eventually wipe to the enrage timer.
The shadow monarch drop chance for its signature items is notoriously low, which is why players farm this fight repeatedly. The shadow gate guide covers the drop rates and farming strategies in detail, including the raid skip mechanics that speed up repeated clears. Understanding the loot table before you commit to farming saves you from burning time on a fight that may not drop what you need.
| Shadow Monarch Element | Mochi Commander Equivalent | Key Difference |
|---|---|---|
| Shadow Clone Phase | Turret Phase | Target identification vs. target destruction |
| Damage Check | Soft Enrage | Hard DPS threshold, team wipe on fail |
| Health Regeneration | Damage Buff | Punishes wrong-target damage |
| Arena Coverage | Rotating Projectiles | Full-arena hazards, no safe zones |
| Drop Pool | Raid-Tier Weapons | Signature items with low drop rates |
The health regeneration mechanic on shadow clones is the most punishing element for uncoordinated teams. Every second spent attacking a clone that is not the real boss gives the actual boss time to recover, effectively erasing your team's progress. This mechanic rewards communication and target calling, which public lobbies often lack.
Transitioning from Mochi Commander to Shadow Monarch
The skills you build in the Mochi Commander fight transfer directly to the shadow monarch raid, but the execution requirements tighten considerably. Turret phase teaches you target priority and positioning, while the shadow clone phase demands faster target identification and stricter burst coordination. Teams that master the first raid's fundamentals find the second raid challenging but learnable, while teams that relied on carries struggle with every mechanic.
Your evolution path also matters for shadow monarch progression. The best evolution guide explains how to unlock the Sung Jin Woo evolution, which provides substantial stat boosts that make the shadow monarch fight significantly more manageable. Evolving before attempting the raid is not strictly required, but the power spike smooths out the difficulty curve considerably.
Raid Farming Efficiency and Progression Planning
Once you can clear the Mochi Commander consistently, the question shifts from how to unlock raids to how to farm them efficiently. Raid rewards in Anime Zero are not guaranteed drops, and the time investment per clear means you need a plan for maximizing returns. Players who farm without a strategy waste hours on inefficient clears while others progress through the raid tiers at a fraction of the time cost.
Daily and Weekly Raid Limits
Anime Zero imposes daily entry limits on raid content, though the exact number varies by raid tier and account progression. The Mochi Commander allows more daily entries than the shadow monarch raid, which makes it the primary farming target for mid-game players. Understanding these limits helps you plan your play sessions around raid availability rather than wasting time traveling to inactive portals.
The raid skip mechanic, covered in the shadow gate guide, allows players to bypass certain phases of fights they have already cleared. This feature dramatically speeds up farming runs, but it requires specific unlock conditions that many players overlook. Unlocking raid skip early in your progression pays dividends across every subsequent farming session.
Reward Optimization and Upgrade Paths
Raid rewards in Anime Zero follow a pity system that guarantees a drop after a certain number of clears without one. This system means that even unlucky players eventually get their raid-tier weapons, though the pity counter resets when a drop occurs. Tracking your clear count helps you predict when a guaranteed drop is coming, which informs decisions about whether to spend resources on temporary upgrades.
The upgrade path from first raid clear to shadow monarch readiness involves several intermediate steps. You need raid-tier weapons from Mochi Commander, accessory upgrades from repeated clears, and evolution materials that drop from both raid tiers. Players who rush the progression chain without building these intermediate power spikes find themselves stuck at the shadow monarch entry gate.
| Progression Stage | Primary Activity | Expected Duration | Key Milestone |
|---|---|---|---|
| Pre-Raid | Story completion, leveling | Until level 85-90 | First raid unlock |
| First Clears | Mochi Commander attempts | 5-10 attempts | Consistent clear |
| Gear Farming | Repeated Mochi clears | 10-20 clears | Raid-tier weapon |
| Evolution | Evolution quest chain | 5-8 hours | Sung Jin Woo unlock |
| Shadow Monarch | Shadow monarch attempts | 10-15 attempts | First clear |
| Endgame Farming | Shadow monarch repeats | Ongoing | Signature drops |
The expected duration values come from community reports and vary based on skill level, team quality, and playtime availability. Players with coordinated teams progress through these stages significantly faster than solo players relying on public lobbies, which is a pattern consistent across all Anime Zero raid content.
Avoiding Common Farming Mistakes
The most common farming mistake is over-farming the Mochi Commander after you have already obtained its key drops. The raid's loot table includes several items that become obsolete once you can attempt the shadow monarch raid, and continuing to farm for those items wastes daily entries that could go toward progression. Check the shadow gate guide's loot table breakdown before committing to extended farming sessions.
Another frequent error is ignoring the evolution quest chain while focusing exclusively on raid progression. The stat boosts from evolution make every raid tier easier, and delaying evolution to farm raids creates a self-imposed difficulty spike. The fastest path to shadow monarch readiness includes evolution as a parallel progression track, not a separate activity to tackle after raid farming.
Frequently Asked Questions
What level do I need to unlock raids in Anime Zero?
The first raid portal activates around level 85, but the recommended level for a comfortable Mochi Commander clear is level 90 to 95. The game checks your total combat power rather than level alone, so a well-geared level 88 character can clear content that a poorly geared level 95 character cannot.
How do I beat the mochi commander turret phase?
Assign two high-mobility players to focus the mochi commander turret while the rest of the team clears adds that apply a slow debuff. Save burst cooldowns for the turret's final 20% health, when projectile speed increases dramatically. Destroying the turret triggers a 15-second vulnerability window on the commander.
What is the best raid strategy for beginners?
The anime zero best raid strategy for new raiders is role assignment: designate a tank, burst DPS, add-clear, and support player before entering. Coordinate ultimates during vulnerability windows rather than using them on cooldown. Prioritize damage reduction traits over raw damage for your first several clears.
How do I unlock the shadow monarch raid?
You need to clear the Mochi Commander raid multiple times to obtain raid-tier weapons, then reach approximately level 120 for a comfortable attempt. The shadow monarch fight introduces a shadow clone phase that requires target identification and strict burst coordination. Evolution through the Sung Jin Woo path provides substantial stat boosts that make the fight manageable.
Can I skip the Mochi Commander and go straight to shadow monarch?
No, the shadow monarch raid requires gear from the Mochi Commander loot table to meet its damage checks. The raid skip mechanic speeds up repeated clears but does not bypass the progression requirements. Attempting shadow monarch with story gear results in hitting the enrage timer with the boss above 30% health.
Mastering the raid progression chain in Anime Zero transforms the endgame from a frustrating wall into a structured climb. The Mochi Commander teaches positioning, target priority, and cooldown coordination, while the shadow monarch raid tests those skills at a higher intensity. Unlock the first raid at level 90, farm it for raid-tier weapons, evolve your character, and the shadow monarch fight becomes a challenging but fair encounter rather than an impossible barrier.